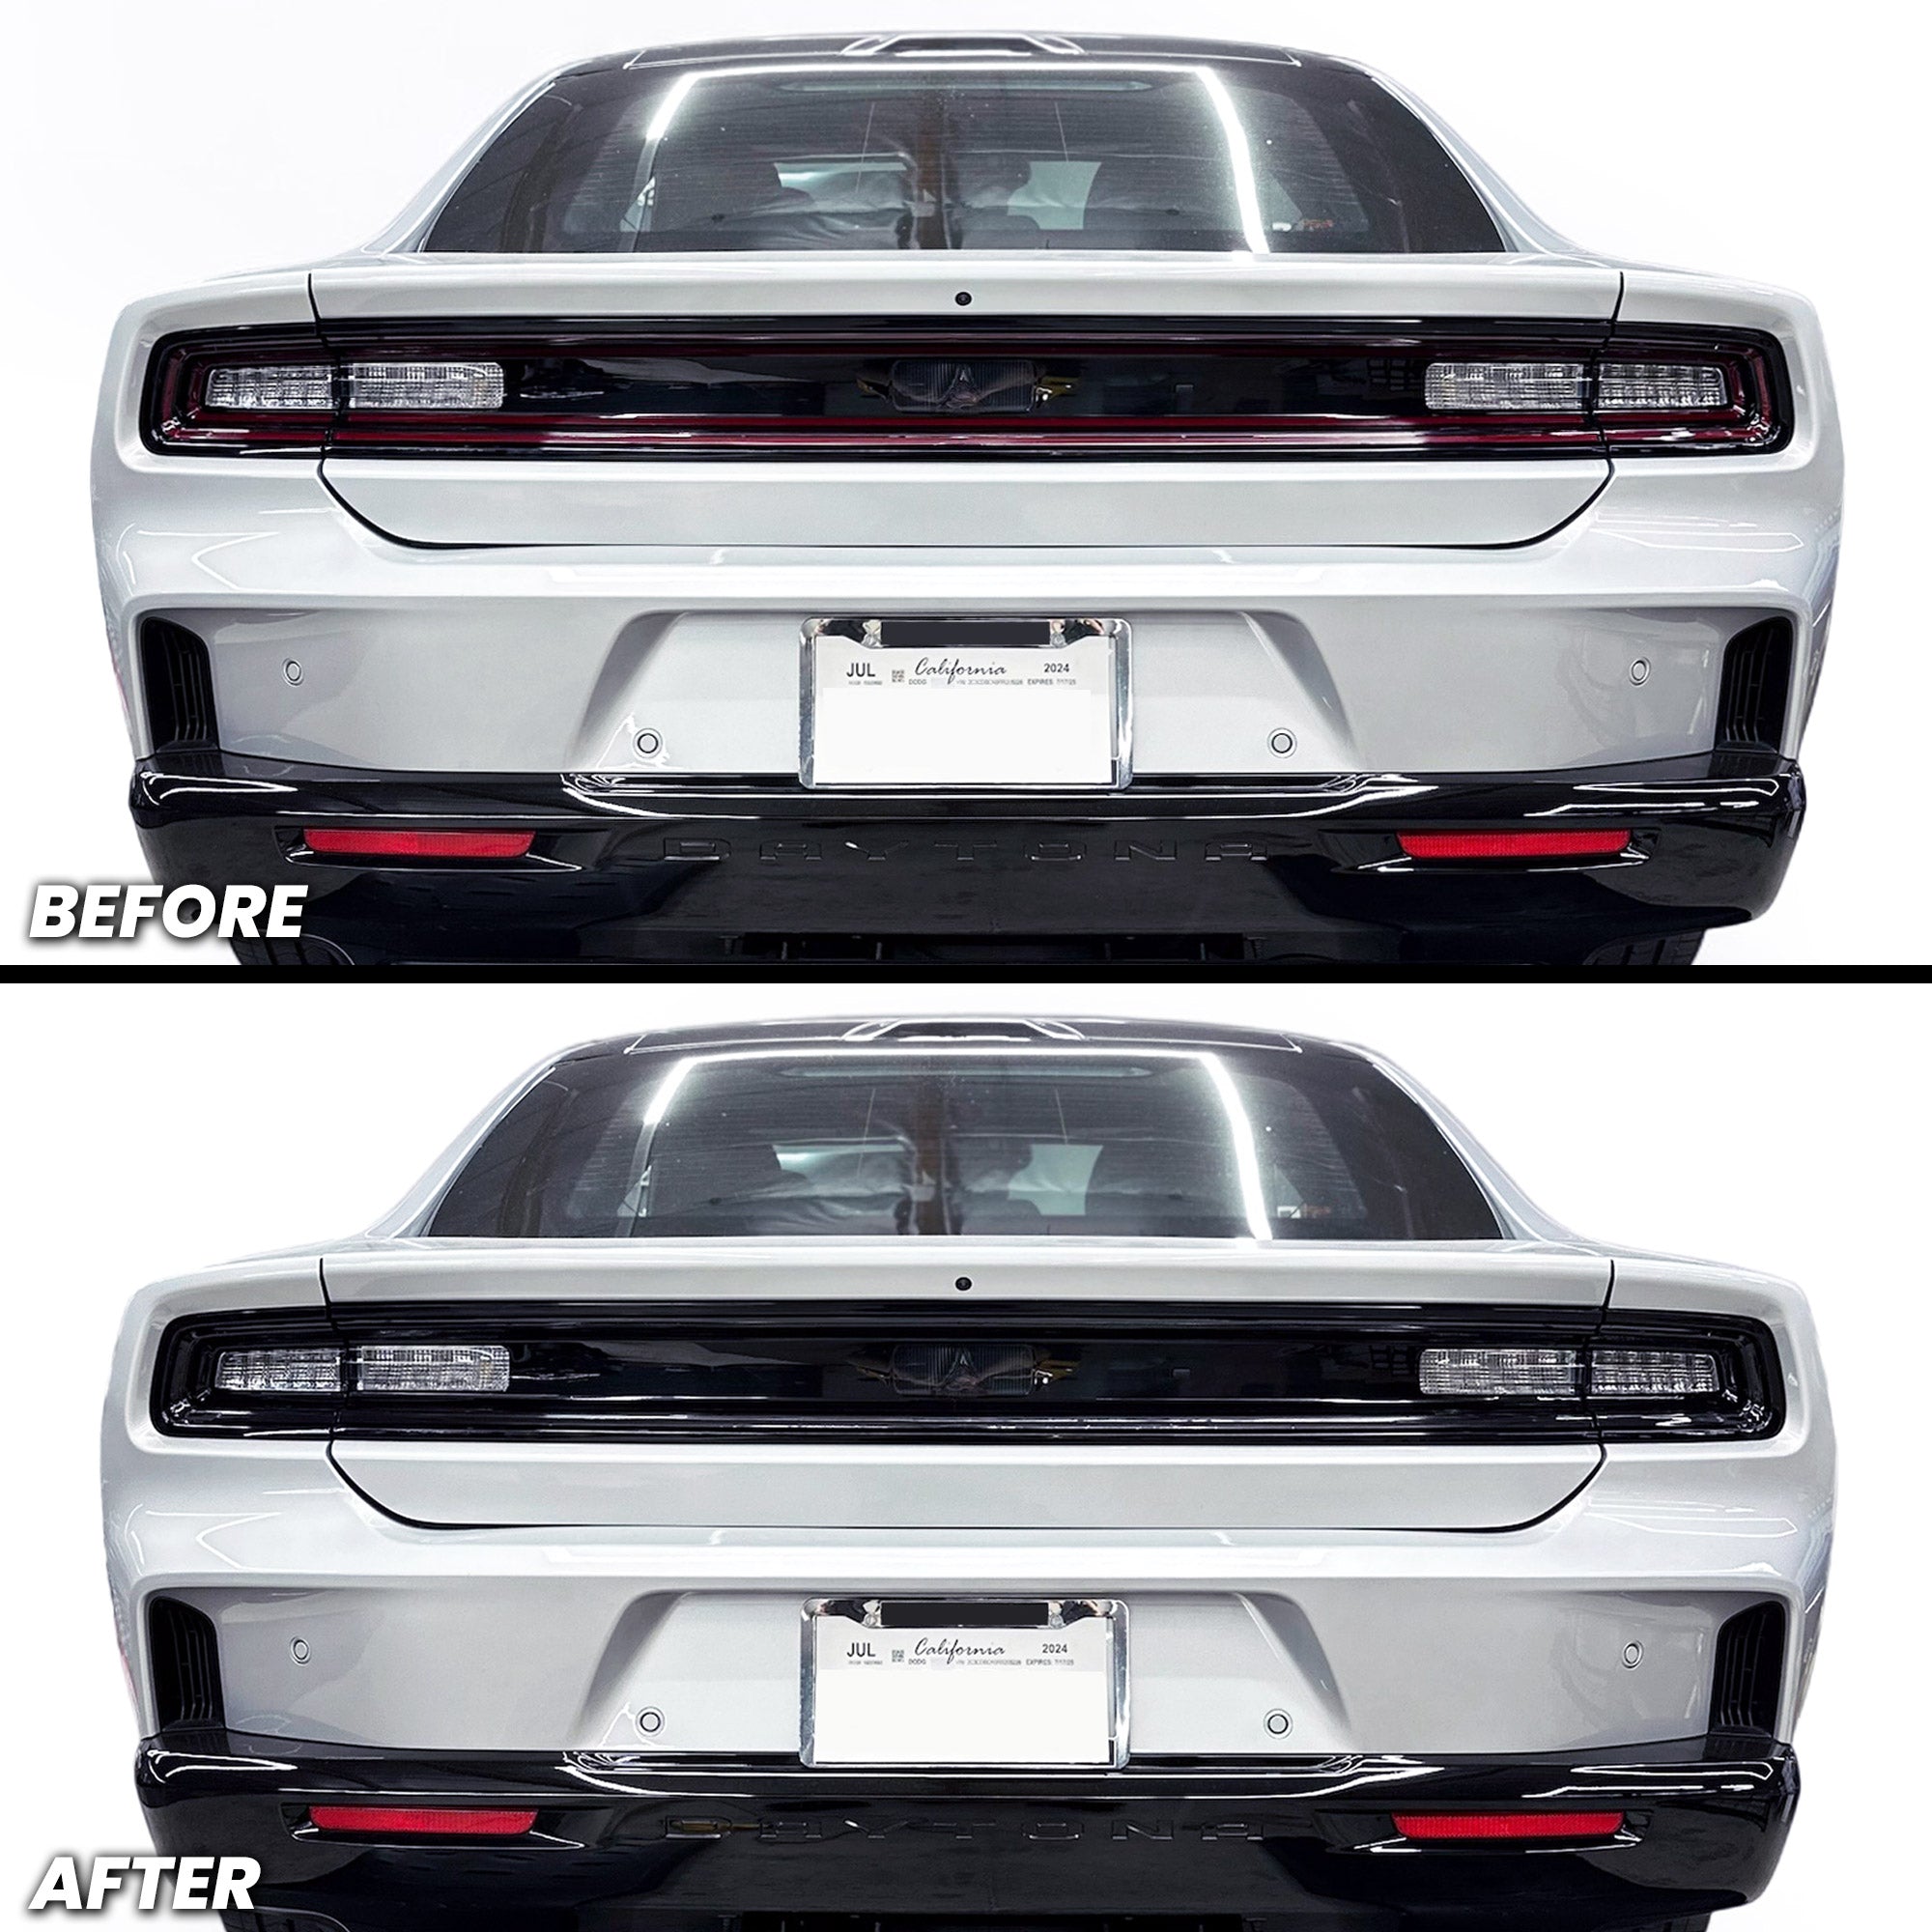
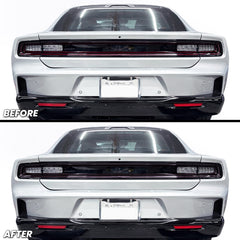
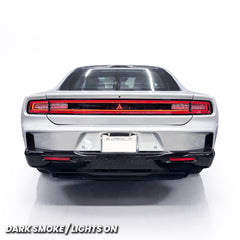
Rear Tail Light Running Brake Lights Pre-cut Overlay Tint for 2025+ Charger Daytona

$89.99
$89.99
Hurry up! only 0 left
Style: Dark Smoke

Free Shipping

Free standard shipping on orders over $35 USA Domestic

Free shipping on orders over $100 for international

Free Returns

Learn More.
Rear Tail Light Running Brake Lights Pre-cut Overlay Tint for 2025+ Charger Daytona

Rear Tail Light Running Brake Lights Pre-cut Overlay Tint for 2025+ Charger Daytona

$89.99

Rear Tail Light Running Brake Lights Pre-cut Overlay Tint for 2025+ Charger Daytona

$89.99
Style: Dark Smoke

Turn heads with our Rear Tail Light Running Brake Lights Pre-cut Overlay Tint for 2025+ Charger Daytona. Transform your vehicle's aggressive presence with premium lighting vinyl tint that demands attention. Choose between two distinctive styles to match your vision: sleek dark smoked or subtle tint with light smoke. Both options feature precision-cut overlays that follow your factory taillight contours, delivering an instantly refined and menacing finish without permanent modification.

Specifications:

  • Fitment: For 2025, 2026 Dodge Charger and Charger Daytona (2-door and 4-door)
  • High-Quality Material: Can withstand all kinds of weather (5 - 7 Year Durability)
  • Easy Application: Nano-air release install (Peel and Stick)
  • Comes in 8 x pieces of pre-cut tint overlay
  • ** NOTE ** Not an actual running brake light replacement; this is a pre-cut overlay tint vinyl  that sticks onto your existing  running taillight brake lens. It offers an aggressive look and style that makes your rear end stand out.

How to Install Running Tail Light Brake for 2025+ Charger Dayton:

For Best Results PROFESSIONAL INSTALLATION RECOMMENDED!
Tools Needed: Heat gun or blow dryer, padded glove or felt-tip squeegee

Step-by-Step Installation:

  1. Rinse the entire tail light / running brake light area with 70% isopropyl alcohol or soap and water to remove all dirt, dust, oils, and debris before installation.
  2. Dry the entire area completely before installation. Make sure there is no moisture, dust, debris, or residue left on the surface. These overlays are designed to be installed dry.
  3. Start with the middle sections of the running brake lights — the straight section that runs from the driver-side trunk line toward the passenger-side trunk line. You may begin with either the inner middle section or the outer middle section.
    1. Align one end of the overlay with the beginning of the red running brake light at the edge of the trunk line.
    2. Position it directly at the edge and make sure the top and bottom of the overlay fully cover the red section while sitting just below the OEM black surrounding line.
    3. Lightly tack down the starting edge. With your free hand, guide the overlay across the light while using your other hand to slowly smooth it onto the surface.
    4. Avoid overstretching the vinyl as you guide it across. Once properly aligned, the overlay should naturally fall into place.
    5. Keep the edge of the tint aligned where the clear lens meets the black painted portion of the taillight housing.
    6. Once you are satisfied with the placement, lightly heat the overlay to help secure it to the housing. Continue to Step 5 below for the finishing process.
  4. Next, install either the outer or inner brake/running brake light overlay that wraps around the clear turn signal section.
    1. You may start with either the smaller or larger C-shaped overlay. The smaller C-shaped overlay is for the inner brake / running brake light section, while the larger C-shaped overlay is for the outer section closer to the rear bumper.
    2. Align one end of the C-shaped overlay with the trunk line and lightly tack it down.
    3. Use your free hand to guide the overlay along the red brake light section while slowly smoothing it onto the surface.
    4. Do not stretch the vinyl. These pieces are pre-cut to fit the shape of the light and only need to be guided into position.
    5. Make sure the overlay follows the red portion of the brake light between the OEM black surrounding areas so that all of the red is properly covered.
    6. Once the desired placement has been achieved, lightly heat the overlay to help secure it to the housing. Continue to Step 5 below to finish the installation.
  5. Continue smoothing each overlay until all flat areas are fully laid down and the desired placement has been achieved.
    Refer to the product photos for accurate placement.
  6. Once all overlays are positioned correctly, follow the steps below to help ensure proper adhesion and long-term durability.
  7. Post-heat the vinyl: Use a heat gun or blow dryer to gently warm the overlay. This helps remove small bubbles and activates the adhesive for a stronger bond.
  8. If any bubbles remain, press firmly with your finger or felt-tip squeegee and push the air toward the nearest edge until it escapes.

📌 Reminder: Always post-heat the vinyl after installation. This activates the glue and ensures maximum adhesion. 

LIGHT SMOKE, DARK SMOKE - INSTALL DRY (there will be a thin protective layer that needs to be peeled after install)

📩 Need Help?
Questions? Contact our support team at:
📧 sales@aeroflowdynamicsoverlays.com

How to Install Running Tail Light Brake for 2025+ Charger Dayton:

For Best Results PROFESSIONAL INSTALLATION RECOMMENDED!
Tools Needed: Heat gun or blow dryer, padded glove or felt-tip squeegee

Step-by-Step Installation:

  1. Rinse the entire tail light / running brake light area with 70% isopropyl alcohol or soap and water to remove all dirt, dust, oils, and debris before installation.
  2. Dry the entire area completely before installation. Make sure there is no moisture, dust, debris, or residue left on the surface. These overlays are designed to be installed dry.
  3. Start with the middle sections of the running brake lights — the straight section that runs from the driver-side trunk line toward the passenger-side trunk line. You may begin with either the inner middle section or the outer middle section.

    - Align one end of the overlay with the beginning of the red running brake light at the edge of the trunk line.
    - Position it directly at the edge and make sure the top and bottom of the overlay fully cover the red section while sitting just below the OEM black surrounding line.
    - Lightly tack down the starting edge. With your free hand, guide the overlay across the light while using your other hand to slowly smooth it onto the surface.
    - Avoid overstretching the vinyl as you guide it across. Once properly aligned, the overlay should naturally fall into place.
    - Keep the edge of the tint aligned where the clear lens meets the black painted portion of the taillight housing.
    - Once you are satisfied with the placement, lightly heat the overlay to help secure it to the housing. Continue to Step 5 below for the finishing process.
  4. Next, install either the outer or inner brake/running brake light overlay that wraps around the clear turn signal section.

    - You may start with either the smaller or larger C-shaped overlay. The smaller C-shaped overlay is for the inner brake / running brake light section, while the larger C-shaped overlay is for the outer section closer to the rear bumper.
    - Align one end of the C-shaped overlay with the trunk line and lightly tack it down.
    - Use your free hand to guide the overlay along the red brake light section while slowly smoothing it onto the surface.
    - Do not stretch the vinyl. These pieces are pre-cut to fit the shape of the light and only need to be guided into position.
    - Make sure the overlay follows the red portion of the brake light between the OEM black surrounding areas so that all of the red is properly covered.
    - Once the desired placement has been achieved, lightly heat the overlay to help secure it to the housing. Continue to Step 5 below to finish the installation.
  5. Continue smoothing each overlay until all flat areas are fully laid down and the desired placement has been achieved.
    Refer to the product photos for accurate placement.
  6. Once all overlays are positioned correctly, follow the steps below to help ensure proper adhesion and long-term durability.
  7. Post-heat the vinyl: Use a heat gun or blow dryer to gently warm the overlay. This helps remove small bubbles and activates the adhesive for a stronger bond.
  8. If any bubbles remain, press firmly with your finger or felt-tip squeegee and push the air toward the nearest edge until it escapes.

📌 Reminder: Always post-heat the vinyl after installation. This activates the glue and ensures maximum adhesion. 

LIGHT SMOKE, DARK SMOKE - INSTALL DRY (there will be a thin protective layer that needs to be peeled after install)

📩 Need Help?
Questions? Contact our support team at:
📧 sales@aeroflowdynamicsoverlays.com

Returns Policy

You may return most new, unopened items within 30 days of delivery for a full refund. We'll also pay the return shipping costs if the return is a result of our error (you received an incorrect or defective item, etc.).

You should expect to receive your refund within four weeks of giving your package to the return shipper, however, in many cases you will receive a refund more quickly. This time period includes the transit time for us to receive your return from the shipper (5 to 10 business days), the time it takes us to process your return once we receive it (3 to 5 business days), and the time it takes your bank to process our refund request (5 to 10 business days).

If you need to return an item, simply login to your account, view the order using the "Complete Orders" link under the My Account menu and click the Return Item(s) button. We'll notify you via e-mail of your refund once we've received and processed the returned item.

Shipping

We can ship to virtually any address in the world. Note that there are restrictions on some products, and some products cannot be shipped to international destinations.

When you place an order, we will estimate shipping and delivery dates for you based on the availability of your items and the shipping options you choose. Depending on the shipping provider you choose, shipping date estimates may appear on the shipping quotes page.

Please also note that the shipping rates for many items we sell are weight-based. The weight of any such item can be found on its detail page. To reflect the policies of the shipping companies we use, all weights will be rounded up to the next full pound.

Related Products

Recently Viewed Products