Popular Products
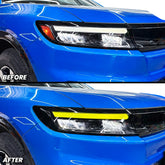
Headlight DRL Daytime Running Lights Pre-cut Overlay Tint and Amber Delete compatible with 2024+ Honda Prologue
- $44.99
- $44.99
- Unit price
- / per
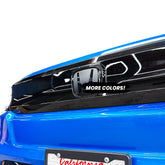
AFDOverlays Front Emblem Badge Pre-cut Overlay Compatible with 2024+ Honda Prologue - Red
- From $25.99
- From $25.99
- Unit price
- / per
-
Red
-
Gloss Black
-
Matte Black
-
Dark Red
- BlueAzure BlueSky BlueMintGreenLime GreenPurpleLavenderHot PinkYellowDark YellowGolden yellowOrangeLight OrangeNardo GreyGloss WhiteMatte WhiteRainbow HoloBlue OpalChrome Rose GoldSilver
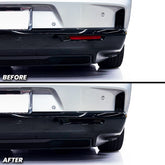
Rear Bumper Reflector Pre-cut Overlay Tint for 2025+ Dodge Charger Daytona
- From $14.99
- From $14.99
- Unit price
- / per
Got Questions?
Email us!
Popular Products
Headlight DRL Daytime Running Lights Pre-cut Overlay Tint and Amber Delete compatible with 2024+ Honda Prologue
- $44.99
- $44.99
- Unit price
- / per
AFDOverlays Front Emblem Badge Pre-cut Overlay Compatible with 2024+ Honda Prologue - Red
- From $25.99
- From $25.99
- Unit price
- / per
-
Red
-
Gloss Black
-
Matte Black
-
Dark Red
- BlueAzure BlueSky BlueMintGreenLime GreenPurpleLavenderHot PinkYellowDark YellowGolden yellowOrangeLight OrangeNardo GreyGloss WhiteMatte WhiteRainbow HoloBlue OpalChrome Rose GoldSilver
Rear Bumper Reflector Pre-cut Overlay Tint for 2025+ Dodge Charger Daytona
- From $14.99
- From $14.99
- Unit price
- / per
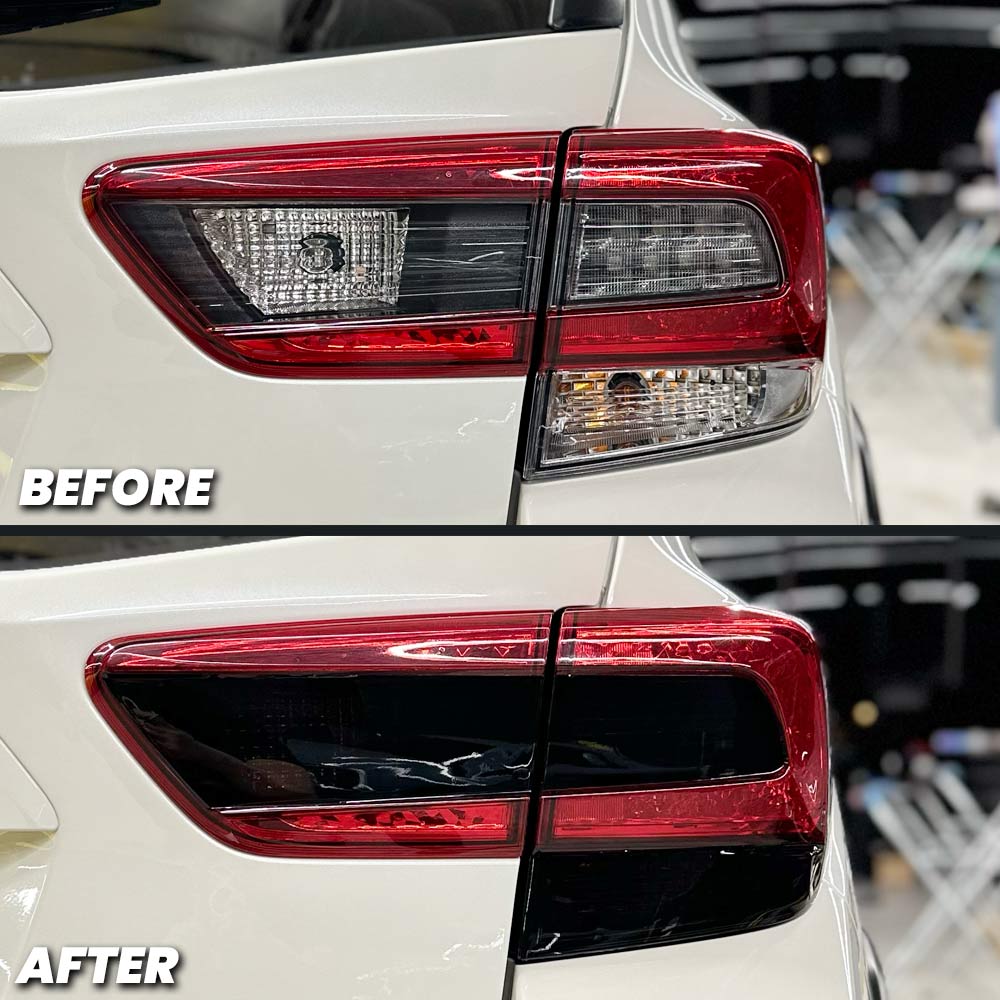


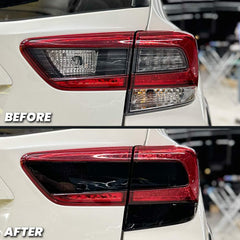
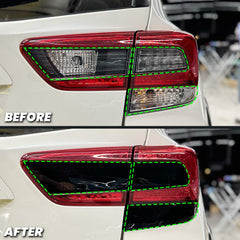
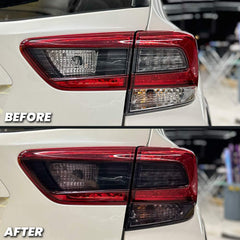
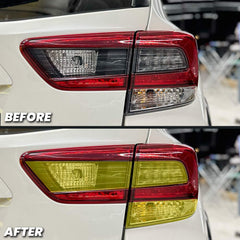
2018-2023 Subaru Crosstrek Smoked Tail Light Turn Signal and Brake Light and Reverse Pre-Cut Overlay
- $22.99
- $22.99
- Unit price
- / per
Couldn't load pickup availability
Free Shipping
Free standard shipping on orders over $25 USA Domestic
Free shipping on orders over $100 for international
Free Returns
You may return most new, unopened items within 30 days of delivery for a full refund. We'll also pay the return shipping costs if the return is a result of our error (you received an incorrect or defective item, etc.).
You should expect to receive your refund within four weeks of giving your package to the return shipper, however, in many cases you will receive a refund more quickly. This time period includes the transit time for us to receive your return from the shipper (5 to 10 business days), the time it takes us to process your return once we receive it (3 to 5 business days), and the time it takes your bank to process our refund request (5 to 10 business days).
If you need to return an item, simply login to your account, view the order using the "Complete Orders" link under the My Account menu and click the Return Item(s) button. We'll notify you via e-mail of your refund once we've received and processed the returned item.
Enhance your 2018-2023 Subaru Crosstrek's look with this Smoked Tail Light Turn Signal, Brake Light, and Reverse Pre-Cut Overlay. It gets of rid the clear feature and offers an aggressive styling that will give your car a sleek and stylish look. Offered in Smoked, Light Smoke, and JDM Yellow colors, you'll be sure to find the perfect fit for your ride.
- Fitment: For 2018-2023 Subaru Crosstrek Tail Light, Brake Light, and Turn Signal Reverse Overlay Smoke Out
- High-Quality Material: Can withstand all kinds of weather (5 - 7 Year Durability)
- Smoked Tint Vinyl Sticker, Changes Rear of Vehicle to Look More Aggressive
- Easy Application, however, PROFESSIONAL INSTALLATION RECOMMENDED
- Comes in Pair (left and Right SMOKE OUT)
- ** NOTE ** Not Actual Tail Light Replacement, This product is an overlay that covers the Tail Light.
How to Install Tail Light Reverse/Turn/Brake signal overlay
For Best Results
Tools: Heat Gun or Blow Dyer / Padded Glove or Felt Tip Squeegee
- Rinse / Soap your Tail-Light to get rid of debris prior to application
- Peel off Tail-Light Tint Overlay
- Align the Overlay from the Inside of the Tail-light trim whether it be the Reverse or Brake Light and work your way to the middle of the rear bumper
- Make sure you have a padded card or soft glove to put on your fingers to begin applying the overlay on the light. If not, your fingers will work.
- For the Brake light, Align the inside curve of the tail light of the taillight overlay onto the inside curved edge and lay it down till it is closest to the middle of the trunk. The edge that looks like \ or / depending on what side of the tail light you are working with.
- However you may align the tail-light from the / or \ corner first if you prefer to lay it on from outer to inner.
- For the Reverse, Align from the / or \ and lay it down till it reaches the pointy edge that is facing the middle of the bumper, make sure you slowly lay it down and push out all the bubble as you lay it.
- For the Turn Signal, there will be 2 pieces of overlay.
- 1st piece will be laid on the top portion of the bump on the turn signal, ONLY on the top part of the bump.
- 2nd piece will start from the edge closest to the middle of trunk/bumper.
- A Heat gun or PROFESSIONAL INSTALLER is best for this part, if you are confident, make sure you lay the overlay on the flat side first, then when it gets to the curve heat gun that portion to a semi hot so that the overlay can stretch around the buldgy edge.
- You may need to adjust the free end as you see fit till it lines up with the end of the turn signal.
- NOTE** This is a harder lay than most overlays, so take your time!
- If using your fingers, start from the pointy edge of the overlay working your way towards the middle of the bumper or vice versa. Swipe left and right gradually to reduce bubbles
- If you have a blow dryer or heat gun, use it to get rid of any tiny bubbles and improve adhesion
- If there are bubbles make sure you press firmly with your finger and swipe it towards the closest edge
- If you mess up, you can peel it off right away with no hassle, and add some heat to get rid of the wrinkles.
- For Best application, use water underneath and squeegee out the water once desired placement is met
Perfect fit
Customer Reviews
Returns Policy
You may return most new, unopened items within 30 days of delivery for a full refund. We'll also pay the return shipping costs if the return is a result of our error (you received an incorrect or defective item, etc.).
You should expect to receive your refund within four weeks of giving your package to the return shipper, however, in many cases you will receive a refund more quickly. This time period includes the transit time for us to receive your return from the shipper (5 to 10 business days), the time it takes us to process your return once we receive it (3 to 5 business days), and the time it takes your bank to process our refund request (5 to 10 business days).
If you need to return an item, simply login to your account, view the order using the "Complete Orders" link under the My Account menu and click the Return Item(s) button. We'll notify you via e-mail of your refund once we've received and processed the returned item.
Shipping
We can ship to virtually any address in the world. Note that there are restrictions on some products, and some products cannot be shipped to international destinations.
When you place an order, we will estimate shipping and delivery dates for you based on the availability of your items and the shipping options you choose. Depending on the shipping provider you choose, shipping date estimates may appear on the shipping quotes page.
Please also note that the shipping rates for many items we sell are weight-based. The weight of any such item can be found on its detail page. To reflect the policies of the shipping companies we use, all weights will be rounded up to the next full pound.
Related Products
- $22.99
- $22.99
- Unit price
- / per
- $22.99
- $22.99
- Unit price
- / per
- $22.99
- $22.99
- Unit price
- / per
- $22.99
- $22.99
- Unit price
- / per
- $22.99
- $22.99
- Unit price
- / per
- $22.99
- $22.99
- Unit price
- / per
- $22.99
- $22.99
- Unit price
- / per
- $22.99
- $22.99
- Unit price
- / per
- $22.99
- $22.99
- Unit price
- / per
- $22.99
- $22.99
- Unit price
- / per
Recently Viewed Products
- $22.99
- $22.99
- Unit price
- / per
- $22.99
- $22.99
- Unit price
- / per
- $22.99
- $22.99
- Unit price
- / per
- $22.99
- $22.99
- Unit price
- / per
- $22.99
- $22.99
- Unit price
- / per
- $22.99
- $22.99
- Unit price
- / per
- $22.99
- $22.99
- Unit price
- / per
- $22.99
- $22.99
- Unit price
- / per
- $22.99
- $22.99
- Unit price
- / per
- $22.99
- $22.99
- Unit price
- / per
- Choosing a selection results in a full page refresh.
