


- Choosing a selection results in a full page refresh.

Got Questions?
Email us!
Couldn't load pickup availability
Free standard shipping on orders over $25 USA Domestic
Free shipping on orders over $100 for international
You may return most new, unopened items within 30 days of delivery for a full refund. We'll also pay the return shipping costs if the return is a result of our error (you received an incorrect or defective item, etc.).
You should expect to receive your refund within four weeks of giving your package to the return shipper, however, in many cases you will receive a refund more quickly. This time period includes the transit time for us to receive your return from the shipper (5 to 10 business days), the time it takes us to process your return once we receive it (3 to 5 business days), and the time it takes your bank to process our refund request (5 to 10 business days).
If you need to return an item, simply login to your account, view the order using the "Complete Orders" link under the My Account menu and click the Return Item(s) button. We'll notify you via e-mail of your refund once we've received and processed the returned item.
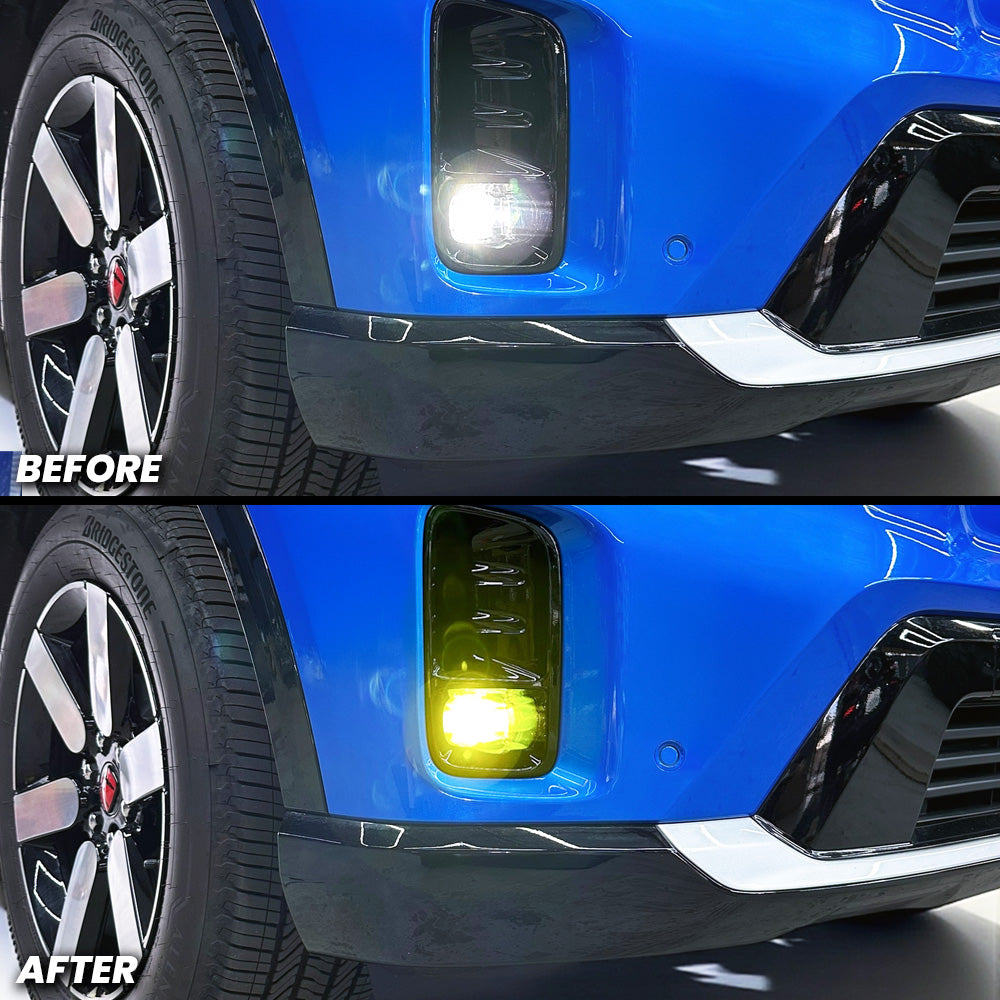
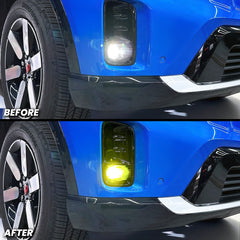
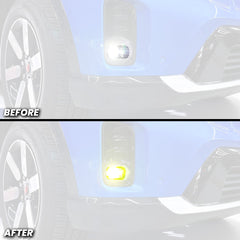
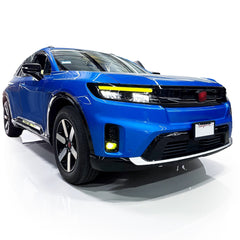
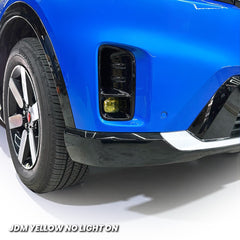
Transform your 20246+ Honda Prologue's fog lights from bland to bold. These fog light pre-cut overlay tints deliver aggressive styling while cutting through darkness and fog with enhanced visibility. Pick your color; each shade is engineered to match your ride's personality. Installation takes minutes with no modifications needed. Built tough to withstand the elements, these overlays resist fading and swap out effortlessly when you're ready for a change. Upgrade your night driving game.
🔧Specifications:
🛠️How to Install 2024+ Honda Prologue Fog Light Pre-cut Overlay Tint:
For Best Results
Tools Needed: Heat gun or blow dryer, padded glove or felt-tip squeegee
Step-by-Step Installation:
Thoroughly clean the entire third brake light using 70% isopropyl alcohol to remove dirt, oils, and debris. A mild soap-and-water solution may also be used as an alternative.
Dry the third brake light fully, ensuring there is no moisture, dust, or residue left on the surface or inside any crevices.
Begin installation on either the left or right side of the Fog Light.
Align the overlay at the edge of the fog light clear just before it turns into the gloss black trim of the surrounding.
Peel the backing from the overlay.
Align the rounded edge closest to the middle of the front bumper, ensuring the clear is completely covered when you align the overlay onto the fog light. May need to slide it into the gloss black housing and continue to lay the rest down till the desired placement is met.
Once aligned, lay the overlay down while smoothing it from top to bottom.
Use your other hand that's not guiding the overlay, fingers or a squeegee, moving horizontally in one direction (left to right or right to left) as you work up and down.
Ensure the top edge of the overlay lines up with the top of the clear lens just before the gloss black trim begins.
Once placement is correct, proceed to the next section.
Post-heat all installed overlays using a heat gun or blow dryer to activate the adhesive and remove minor bubbles.
If bubbles remain, press firmly with your finger or squeegee and push them toward the nearest edge.
If a mistake is made, gently peel the overlay back immediately and reapply. Use light heat to relax the vinyl and remove wrinkles.
Light Smoke includes a PET protective liner that must be removed after installation.
Some Dark Smoke overlays may also include a PET liner.
If you are unsure, please contact us before removing anything.
📌 Reminder: Always post-heat the vinyl after installation. This activates the glue and ensures maximum adhesion.
📩 Need Help?
Questions? Contact our support team at:
📧 sales@aeroflowdynamicsoverlays.com
You may return most new, unopened items within 30 days of delivery for a full refund. We'll also pay the return shipping costs if the return is a result of our error (you received an incorrect or defective item, etc.).
You should expect to receive your refund within four weeks of giving your package to the return shipper, however, in many cases you will receive a refund more quickly. This time period includes the transit time for us to receive your return from the shipper (5 to 10 business days), the time it takes us to process your return once we receive it (3 to 5 business days), and the time it takes your bank to process our refund request (5 to 10 business days).
If you need to return an item, simply login to your account, view the order using the "Complete Orders" link under the My Account menu and click the Return Item(s) button. We'll notify you via e-mail of your refund once we've received and processed the returned item.
We can ship to virtually any address in the world. Note that there are restrictions on some products, and some products cannot be shipped to international destinations.
When you place an order, we will estimate shipping and delivery dates for you based on the availability of your items and the shipping options you choose. Depending on the shipping provider you choose, shipping date estimates may appear on the shipping quotes page.
Please also note that the shipping rates for many items we sell are weight-based. The weight of any such item can be found on its detail page. To reflect the policies of the shipping companies we use, all weights will be rounded up to the next full pound.
Thanks for subscribing!
This email has been registered!